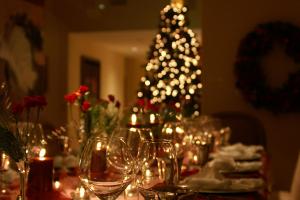
The calendar is confidently dropping pages marked “December”, which means the New Year is getting closer. Pleasant bustle, shopping trips, plans and dreams - we are slowly getting involved in this marathon. But the most important thing is, of course, the Christmas tree, without which this holiday is unthinkable. Let's find out how to decorate this tree so that the meeting of the coming year remains a bright event in memory.
Christmas tree decoration tradition
The tradition of decorating the New Year tree came from Germany - at the beginning of the 16th century, this tree turned from an attribute of Christmas into a symbol of winter holidays in general (fortunately, the time difference between Christmas and New Year is small).
According to one version, the festive tree owes its canonical appearance to Martin Luther - it is believed that it was he who placed a coniferous tree with candles and the Star of Bethlehem on the top on the festive table (beech branches and young deciduous trees were widely used before that).
The first Christmas trees were small so that they could be placed on the table. In the 17th-18th centuries, the coniferous beauty became a tradition throughout Europe, and large trees came into fashion. A little later, the holiday tree reached the United States, and modest decorations were replaced by wax and cardboard, and then glass toys. 
In Russia, the first such decorations appeared through the efforts of Peter I, but they became relatively popular only towards the end of the 19th century: since it was one of the items of aristocratic life.
Important! At Christmas tree markets, trees are often sold with tied branches. Before you buy the tree you like, ask the seller to remove the threads to make sure that the specimen has the correct shape.
The turbulent 20th century also affected the “biography” of Christmas trees: with the outbreak of the First World War, Nicholas II, remembering the German roots of the tradition, forbade decorating them - they say, this is an enemy custom. The Bolsheviks, having come to power, canceled this decree, but less than ten years passed before the tree came under another ban: in 1926 it was recognized as part of an anti-Soviet ritual.
It was only on New Year's Day 1936 that the green beauties were rehabilitated, and since then, slender trees with a luxurious pine aroma have become an integral attribute of the New Year's Eve in our area.

How to decorate a Christmas tree correctly
Everyone knows that how you greet the coming year is how you will spend it. Therefore, much attention is paid to its symbols, with which they try to decorate the festive tree.
According to the eastern calendar, 2018 is the year of the earthen Dog, which gravitates toward any shade of yellow. Orange and sky blue are also suitable. Both green and brown suit the hostess of the year, but the first in the dark version will blend in with the color of the needles, while the second is not particularly festive and bright.
Did you know? The first New Year's tree celebration in the USSR with all its attributes (including a matinee) took place at the very end of 1935 at the Palace of Pioneers in Kharkov.
The solution is simple - give preference to jewelry with a golden tint, namely:
- gold and golden blue;
- rich yellow;
- gold and white;
- combination of green and gold;
- Bright green elements reminiscent of the color of meadow greenery will also look good.

The only exception is the rich red color, which scares away the Dog, reminding it of fire. Many people decorate the tree with toys in the form of a symbol of the year - combinations of toys in the form of the “patron” of the coming year and other symbols under which the owners of the house were born are considered especially successful.
The rest of the decoration process depends on the flight of fancy. The main thing is that the tree should look harmonious. That is, toys and garlands are placed so that they visually emphasize the entire appearance of the tree.
Getting carried away with the decor of one side or several branches usually results in the opposite effect - the tree seems overloaded, which is what they try to avoid. In addition, for a small tree this threatens to overweight. To prevent this from happening, keep these simple rules in mind:
- toys should be proportionate to the tree (large ones are suitable for a large tree, smaller decorations are suitable for a medium one);
- the largest of them are placed at the bottom, gradually decreasing the size in the upward direction;
- products of the same shape or color are placed away from each other;
- The location of the tree also plays a role. So, a Christmas tree placed in the center of the room is hung evenly, and placed in a corner - with emphasis on the visible side (everything bright is hung in front, while more modest toys are placed in the back, thereby creating balance).
Important! The tree trunk at the very bottom is cleared of 8-10 cm of bark: this allows the pores to open. The tip itself is sharpened with a sharp knife.
Finally, about the top - it is usually crowned with a star or a snowflake, although they are gradually replaced by figures of various characters or bows of various shapes: from a modest butterfly to an impressive “jellyfish” covering all the upper branches. In any case, be guided by your taste and do not forget about safety. 
Classic style
Fans of the traditional style prefer trees of medium height (about 1.5-2 m). The basis of the design is green and red balls, which are complemented with ribbons and garlands. If this color seems too strict, add several gold or silver, blue or purple balls.
As for the quantity, about 20-25 balls hung in tiers are enough for an average Christmas tree 1.8 m high. Between them you can hang bows from gift ribbon or shiny tinsel. If the tree is pleased with densely sprouting needles, smaller bows, decorative candles or cards are often placed in them.
Note that the tone of the main decorations can be any - both glossy and matte. To liven up the overall look, some experiment with the design of the needles: they are coated with shiny varnish. 
Did you know? The Turkish New Year is also celebrated with the obligatory participation of a Christmas tree: this has been the custom since the 20s of the last century, when the Muslim country switched to the Gregorian calendar.
Modern Christmas tree
Decorating the green symbol of the New Year is a great way to show your creative ideas and move away from the classical canons. Of course, this is a matter of taste, but general trends still stand out: Among which the most interesting are:

Important! The most fragile toys are handled with gloves - this way there is less risk of getting a cut or getting your fingers on the smooth side of a shiny ball.
In a burst of inspiration, it’s still worth remembering that the Christmas tree should also look stylish (but not tacky) - a sudden change in image will require at least a revision of the decorations put aside on the mezzanine or a trip to the store.
How to decorate an artificial Christmas tree
Many people prefer artificial trees. They are durable, easy to assemble, and there is no need to remove fallen needles from the floor either. There are no special nuances regarding their decoration - the rules are similar to the principles of decorating living trees.
But there is still one feature and it is connected with the color scheme. Toys should highlight the main color. For example, for a tree with a dark covering of branches, light green or pale scarlet balls are suitable (as well as decorations in warm colors).  There are many artificial fir trees on sale with imitation snow on the tips of the branches. In this case, you should not oversaturate the tree with white or silver elements.
How to decorate a white (silver) Christmas tree
Such Christmas trees also find their fans. A clear advantage is the ability to enliven any interior - a white or silver miracle is considered a decoration in itself.
Based on this, designers advise hanging toys without much fanaticism, giving priority to toys in the form of blue, dark blue or silver balls. It turns out to be a winter fairy tale in a separate room.
Did you know? The Venetians were the first to celebrate the New Year on January 1 - back in 1522.
Red or golden balls will come into place. Some go further, hanging pink ones (they look most advantageous without the participation of other colors, especially if you play with the shade on the tiers - for example, from rich at the bottom to pale closer to the top). 
Decorating a Christmas tree in the yard (outside)
A Christmas tree growing in the garden, in the yard, or just on the street near the house can also become the central figure of a festive evening. Such trees are decorated a little differently: in addition to beauty, the practicality of the toys is also important, as they must withstand the effects of low temperatures and precipitation without losing their external luster.
This will come in very handy:- the largest toys (good if unbreakable) without fabric upholstery and with high-quality painting;
- homemade decorations and garlands;
- pieces of bright fabric that is not particularly sensitive to moisture;
- LED garlands.
Did you know? In Spain, there is a tradition of eating 12 grapes in the last minutes of the year.
To enhance the festive atmosphere, various figures are placed around the tree. 
Decorating the Christmas tree with ribbons
A correctly selected ribbon in the form of “rain” or tinsel transforms the Christmas tree. The color is selected based on style preferences: for seasoned classics, a monochromatic design is suitable. But harmonious alternation of colors is already the prerogative of brighter compositions.
Important! It is advisable to place the ribbons away from the constantly switched on garland. Do not allow material to come into contact with the light bulbs - it may catch fire.
The best option is the spiral arrangement of ribbons on the branches that is familiar to many. Although trying to launch them vertically can also give good results. An artificial spruce in the shape of a more regular triangle allows you to hang such decorations in tiers (in several rings with equal breaks).
By the way, about the design of the ribbons themselves. Overly lush tinsel is finally a thing of the past - it has been replaced by more subtle products: from two-color “rains” to entire necklaces inlaid with bows or beads. 
Christmas tree made of sweets or fruits
Well, where would we be without treats! Actually, cookies and sweets appeared on spruce branches much earlier than other decorations. The current assortment has revived and diversified this tradition: candies in colored wrappers and round cookies, mini-chocolate bars and round caramels are used.
But beyond competition, of course, are nuts and small fruits. The smallest tangerines or apples can be safely tied on powerful lower branches, closer to the trunk. Don’t forget about baking: if you have molds in the shape of stars, a moon, or at least a circle, plus a little time, you’ll get gorgeous (and tasty) decorations.
The idea of using flowers to decorate Christmas trees is just taking root in our latitudes. This method has a couple of significant disadvantages: costs and labor intensity (especially with fresh flowers). But all this is “interrupted” by the stunning view of the decorated tree - just like a fairy tale! 
After reviewing a lot of photos, you will be convinced that the most spectacular are the following color placement options:
- living buds will be favorably emphasized by multi-colored balls and ribbons running along green branches;
- The most chic thing is a spiral of fresh flowers. Although those who have dealt with such structures claim that each bud has to be covered with a damp cloth and regularly checked so that they do not dry out;
- inclusions in the form of individual flowers of delicate shades;
- a ribbon dotted with artificial red petals looks most advantageous if such a spiral ends with a large bow at the top;
- Another option is several emphatically large artificial flowers in combination with a casually thrown ribbon.
If we talk about the types of flowers, then roses and lilies take precedence here. One way or another, living decorations are usually placed on the branches last (so that they do not fade ahead of time).
It’s easier with artificial ones - the choice of shades is huge. True, it is better to give preference to pink, yellow or blue sets. 
Decorating the Christmas tree with a garland
This will be the first stage of work - it all starts with the garland.
To make the illumination pleasing to the eye, you need to check its serviceability even before placement. After making sure that all the lights are flickering as expected, we get to work.
The play of light will be most impressive if the cord is hung according to the following patterns:
- in a spiral (sort of a visual frame for balls and ribbon);
- it is easier to place it in a circle - the toys are placed in random order;
- vertically. This principle is suitable for lovers of minimalism. Another difference is that it is desirable that in this case the colors of the lights be uniform.
Important! Particular attention should be paid to street garlands. So, the wiring must be well insulated and protected from direct moisture.

It seems simple, but there are a couple of points that are sometimes forgotten. Firstly, the garlands are laid out along the branches from top to bottom, carefully hiding the cord. Second: don’t get too carried away - there should be room for toys between the stripes. It would be good to check the result of the work by stepping aside a little and turning on the illumination.
The lighting should be approximately the same, without obvious dark spots. They can be eliminated by simply moving the awkwardly placed segment. There are no problems with choosing a garland - both strict plain “lanterns” and multi-colored stripes are sold.
One of the unusual Christmas tree decorations is ribbons. They can completely replace the tinsel on it, and you can also “play” with the color and texture of the material.
But it’s not enough to simply hang ribbons on tree branches. You need to do it beautifully so that your Christmas tree is remembered by the guests, and also decorates the room favorably. How to do it? Read all the secrets in this article!
In addition to burlap ribbons, you will need the following materials:
- chenille wire (fluffy);
- scissors, artificial spruce branches;
- Christmas tree decorations and garland with lights.

Use ribbons of different sizes, so the Christmas tree will become more diverse in terms of decor and acquire originality.
Step 1. Of course, at the first stage you need a finished Christmas tree. Therefore, if your “beauty” is collapsible, then you need to assemble it.

Step 2. To add splendor to your Christmas tree, you can add artificial spruce branches to it. To do this, twist several branches together and tie a wire to them. Secure the branches to the tree trunk. Make sure that their location is even throughout the tree.

Step 3. Now hang the lights on the tree.

.jpg)
Step 4. It is best to use green chenille wire. This way it won’t stand out among the spruce branches. Cut it into small pieces.
.jpg)
Step 5. Step back a few centimeters from the edge of the wide ribbon and wrap the wire around it. But in such a way that the knot has a free end. You will later use it to attach the decor to the branches of the spruce tree.
.jpg)
Step 6. Continue tying the fluffy wire around the ribbon at the same distance (about 15-20 centimeters). Do this along the entire length of the decor.
.jpg)
Step 7 Start decorating the tree from the top. Tie one edge to the branch using the free end of the wire.
.jpg)
.jpg)
Step 8 Attach the tape to the branches in a spiral pattern, gradually decreasing. Leave small distances between branches.
.jpg)
.jpg)
To hide the sharp transition between ribbon frills, you can use the ends of branches. This will also provide additional fastening for the tape.
.jpg)
Step 9 Also tie the edge of the ribbon to the bottom branch so that it does not unwind.
.jpg)
Step 10 A narrow ribbon will help give your Christmas tree decor an unusual texture. You can even use a decorative cord to match the color of the main ribbon. Also tie chenille wire to one end and attach it to the branches.
.jpg)
Step 11 Place the second ribbon between the other decor, creating unusual twists.
.jpg)
Step 12 Decorate the Christmas tree with New Year's toys.
.jpg)
.jpg)
Step 13 Decorate the top of the tree with a bow made from a wide ribbon. Leave the edges of this unusual decor long. You can attach the bow using the same chenille wire.
.jpg)
Tie it on the back of the knot and secure it to the tree. Spread the loose ends along the entire length of the Christmas tree.
.jpg)
You can use ribbon to make a chain for decorating a Christmas tree. To do this, cut it into small pieces and glue them together. To connect the rings together, thread the two blanks onto a piece of tape and glue the edges together.

You can also decorate the Christmas tree with original bows made from narrow ribbon. Fold it in several rows in the form of an accordion. Hold the middle of the bow with your fingers. Tie a wire with a free end to it and secure it to the branches.

Instead of ribbon, you can use tulle for decoration. Fold it several times and attach it to the branches.


Or cut it into strips.
It's hard to imagine a Christmas tree without decorations. Some have balls hanging on the branches of the forest beauty, while others have bows. They can be made from paper or ribbons. This decoration will create a real festive atmosphere. There are several ways to tie a bow. It all depends on its purpose. After all, you can attach a bow to a ball, simply hang it on the paws of a spruce tree, or decorate the top of a tree with it. It doesn't require a lot of materials. So, how to make bows for a Christmas tree?
What you will need
To make bows, you need to prepare all the tools and materials in advance. You will need:
- Glue.
- Scissors.
- Ribbon.
You need to choose the right tape
Before purchasing a ribbon, you should decide on its texture and color. It is best to choose a material that matches the tone of the balls. As for quality, you can use the standard option - satin ribbons. Of course, many beginners may find this fabric too slippery. Therefore, to make Christmas tree bows with your own hands, you can use a rougher material. If you have no skill in needlework at all, then you can take special tapes with wire laid along the edges. They hold their shape perfectly and do not slip.
If the ribbon is tied well into a sufficiently strong knot, then you can easily make bows for the Christmas tree with your own hands. It is worth noting that it is very difficult to create jewelry from some types of material without the use of threads, needles and wire.
If you wish, you can experiment a little and try to combine several types of fabric in one bow. In addition, you can use ribbons of different widths. This will allow you to create more original and beautiful bows for your Christmas tree with your own hands.

The easiest way
This is the simplest method that allows you to create jewelry without using additional tools. The main thing is to remember that it takes a lot of ribbon to make one bow. After all, it doesn’t stick, but gets tied. It is on the knots that more material is spent, and not on the loops.
First you need to cut a piece of tape to the required length. It is worth making sure that this amount of material is definitely enough. It’s better, of course, to make it small, which will make tying the bow easier. You also need to leave beautiful ponytails.
Place the tape on the table. Both ends of the fabric should be pulled towards the center and then overlapped. The result should be beautiful loops and two tails. If necessary, the details of the bow can be corrected. To make beautiful bows for the Christmas tree from ribbon, you need the loops to be the same size. Now you can start tying. Cross the loops of the future bow, placing the left one on the right one. You should be careful and attentive. You need to draw the left one around the right loop and pass it into the loop that forms in the center. Now you can tighten it tight.
At the end, you should definitely correct all the loops and tails to avoid breaking the symmetry. That's it, the bow is ready!

Decoration with metal wire
You can make bows for a Christmas tree from ribbon using various devices. Products, for example, with wire are ideal not only for decorating a New Year's beauty, but also for decorating a room, bouquets of flowers, wreaths and, of course, gifts.
To make such a bow, you need to cut a piece of ribbon as described in the previous method. After this, the material must be laid out on a smooth and level surface. The ends of the ribbon should be pulled to the center of the future bow, placing them on top of each other. The fabric should be held in the center, otherwise the symmetry will be broken. Exactly in the middle you need to wrap the bow with wire. You can hide this detail with the same tape. Simply wrapping the middle is enough. To do this, you can use material of the same shade or play with contrast. This is optional. You can secure the tape with glue or simply sew it on.
If necessary, the loops and tails can be adjusted. This will give the decoration a neat look. That's all. This way you can create multi-colored Christmas bows for your Christmas tree.

How to make a double bow
This product can be used for decorating rooms, decorating forest beauties and gifts. Making double bows for a Christmas tree from ribbon is very simple. First of all, you should cut off a piece of material. It is worth remembering that such products require more tape. After this, fold the first pair of loops as described in the previous method. At the same time, you should hold the tape. Now you can fold the second pair. If you are a beginner, you can ask someone for help.
In this way you can make a very lush bow. It all depends on the number of loops. To begin with, it’s better to try to create a simple and a double one.
Once the loops are folded, cut off any excess tape. The center of the decoration should be tied with wire or sewn using a thread and needle of the appropriate color. This will allow the loops to be secured. If wire is used for connection, then simply wrap it around the center. Then you can cover it with tape. The thread must first be wound around the center, and then stitched through all layers of fabric. At the end you must tie a knot.
A piece of tape can hide the attachment points. It should be fixed with glue. The result is an original bow for the Christmas tree. The master class is now complete. The finished decoration can be hung on the forest beauty.

Flower decoration
Such bows look like one big one and can also be used to decorate New Year's beauties, gifts and wreaths. A Christmas tree with bows looks amazing. The photo will convince you of this. Take the ribbon and cut a piece. Measure exactly 115 centimeters. The first loop needs to be made of only 20 centimeters. Pinch this part of the bow between your fingers. After this, you need to make another similar loop on the left side of the finished one. You need to hold the individual parts of the bow in the center. Now you should make the same loop, but on the right. That's not all. In the same way, you need to make up to five pairs of loops on each side to make a magnificent decoration. The bow must be secured. To do this, wrap a wire around its center and tighten it as tightly as possible. After this, you can remove everything unnecessary.
To hide the wire, you can wrap a piece of tape around the center, carefully gluing it in place. The loops of the decoration must be straightened. They should fluff up. As a result, the product will look like a flower.

Finally
Now you know how to make bows for a Christmas tree from regular ribbon. When choosing glue for making such jewelry, it is worth conducting a small test. Just drop a little on a small piece of tape. If the glue appears on the back side, then you should not use it.
Today, many people prefer to decorate the branches of the forest beauty not with purchased figurines, but with their own New Year’s decor. Today we will figure out how to make bows for the Christmas tree with your own hands? With the help of our master classes you will create real masterpieces of applied art.
DIY Christmas tree bows from ribbons, master class with photos
This ribbon bow is perfect for decorating the top of the Christmas tree - an original, newfangled idea. Let's get creative!
Before you start, you need to stock up on:
- fabric tape (tartan) 25 mm
- rep ribbon 9 mm
- scissors
- template - a cardboard rectangle with a slot in the middle
- lighter
- clamps
- glue gun
- thread and needle
Step-by-step instruction

What other bows for the Christmas tree can you make with your own hands, photo
Ribbon bows can be used to decorate not only the Christmas tree, but also greeting cards and a box with a New Year's gift. You can choose ribbons of various color combinations and arrange a real New Year's “Scottish fireworks display”.
The photo shows a variety of bow options made in a similar style.


Christmas tree bow made from ribbon, master class
Now let's look at another way to make bows for a Christmas tree with your own hands - this original master class is very easy to master. Thanks to this method, you can create many neat bows in a short time with minimal costs for materials.

Necessary materials
- multi-colored satin, satin or nylon ribbons - width 0.5, 2.5 and 5 cm
- scissors
- thread with needle
- lighter
Step-by-step instruction

Christmas tree bows made from ribbons in different color combinations, photo


How to make bows for a Christmas tree with your own hands, master class with photos
Our third master class is devoted to studying the classic version of creating this type of Christmas tree decorations.

Necessary materials
- we only need multi-colored ribbons made of wrinkle-resistant material (satin, polyester, satin).
Step-by-step instruction

How to tie Christmas tree bows?
Using a thread threaded from the inside of the product, you can discreetly attach a bow to the New Year's tree. A thin elastic band is also used for this purpose.
A special lush bow can be created if you connect several small bows together. Take a satin or satin ribbon 60 cm long and cut it into three equal parts. We sew each piece into a bow, which then needs to be glued together using a glue gun. It turns out a voluminous New Year's decoration for the Christmas tree. You can also use beads, rhinestones and seed beads as decoration.


How to make bows for a Christmas tree with your own hands, video
DIY ribbon bows will add a touch of coziness and comfort to the room. And how the process of creating crafts brings children and parents closer together! Try to make it together and then decorate the Christmas tree with bows for the New Year 2016. Let this become your family tradition. Watch our video with a detailed master class and create beauty!

